The Traditional Method Done Right
While compression couplings offer quick repairs, sometimes PVC cement and primer give you the strongest, most permanent fix. This guide shows you a technique where you bend the pipe to make connections instead of using expensive slip fixes or telescoping couplings.
- Permanent Bond: PVC cement creates a chemical weld that's as strong as the pipe itself
- Cost Effective: Standard couplings cost less than slip fixes
- Bend Technique: Flex the pipe slightly to insert the repair section - no special fittings needed
- Professional Results: The same method used by irrigation pros
Tools Needed
- PVC pipe cutter or hacksaw
- Measuring tape
- Marker or pencil
- Shovel (for buried pipes)
- Rag or towel
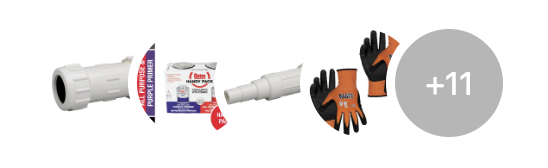
Shop Lowe's Collection
 Shop All Parts at Lowe's
As a Lowe's affiliate, I earn from qualifying purchases. This does not affect your price.
Video Tutorial
Watch me demonstrate the bend-pipe technique for making professional PVC repairs with cement and primer.
How PVC Cement Works
PVC cement isn't actually glue - it's a solvent that chemically welds the plastic together:
- Primer (Purple): Cleans the surface and softens the PVC to prepare for bonding
- Cement (Blue/Clear): Dissolves both surfaces so they fuse together as one piece
- Chemical Weld: When cured, the joint is as strong as solid pipe
This creates a permanent, leak-proof connection that handles full system pressure.
Safety & Ventilation
PVC primer and cement produce strong fumes. Work in a well-ventilated area or outdoors. Avoid breathing vapors directly and keep away from flames - the solvents are flammable. Wear gloves to keep primer off your hands (it stains!).
1 Expose and Assess the Damage
Locate and dig around the broken pipe:
- Dig at least 12 inches on each side of the break for working room
- Clear dirt from under the pipe so you can flex it
- Make sure pipes are dry - cement won't bond to wet surfaces
- Turn off water and let the area drain completely
Pro Tip
The bend technique requires some flex in the pipe. Dig enough space underneath so you can push the pipe down to create clearance for the repair piece.
2 Cut Out the Damaged Section
- Mark your cut lines on either side of the damage
- Use a PVC pipe cutter for the cleanest cuts (hacksaw works too)
- Make cuts as straight and square as possible
- Remove any burrs from the cut edges
Measure Carefully!
Your replacement piece needs to account for coupling depth. Measure how far the pipe inserts into each coupling (usually about 1 inch) and add that to your gap measurement.
3 Prepare the Replacement Piece
- Measure the gap between cut pipe ends
- Add coupling depth for both ends (typically 2 inches total)
- Cut your replacement piece to this length
- Dry-fit everything to confirm proper length
- Pre-attach both couplings to the replacement piece
Having the couplings already on your repair piece makes the bend technique much easier.
4 Apply PVC Primer
- Apply primer to the outside of all pipe ends (existing and replacement)
- Apply primer to the inside of both couplings
- Work quickly - primer dries fast
- Use enough to fully coat the bonding surfaces
Why Purple Primer?
The purple color is actually a code requirement in many areas - it proves the joint was properly primed. Some inspectors look for this purple ring around every joint.
5 Apply PVC Cement & Connect
This is where the bend technique comes in - work quickly!
- Apply cement to the primed pipe end AND inside the coupling
- Bend/flex the existing pipe down to create clearance
- Slide one coupling onto the first pipe end
- Apply cement to the other end
- Release the bend and push the second coupling onto the other pipe
- Give each joint a quarter turn to spread the cement
- Hold firmly for 30 seconds
Work Fast!
PVC cement sets in 15-30 seconds. Have everything ready before you start cementing. Once you apply cement, you have very little time to make adjustments.
6 Cure Time & Testing
Allow proper cure time before pressurizing:
- Initial set: 30 seconds to 2 minutes (don't move the joint)
- Handling strength: 15-30 minutes
- Full cure for pressure: Wait at least 2 hours for irrigation pressure
- Best practice: 24 hours for maximum bond strength
After cure time, turn on the water slowly and check for leaks before backfilling.
Bend Technique vs. Slip Fix
Why use the bend technique instead of a slip fix or telescoping coupling?
Bend Technique Advantages:
- Lower cost: Standard couplings are much cheaper than slip fixes
- Stronger joint: Full cement bond on both ends
- Readily available: Standard couplings are always in stock
When to Use a Slip Fix Instead:
- Pipe has no flexibility (against a wall or foundation)
- Very long repair section with no room to bend
- Working in extremely tight spaces
Common Mistakes to Avoid
- Wet pipes: Cement won't bond properly to wet surfaces - let everything dry first
- Skipping primer: Primer is essential for a proper bond - don't skip it!
- Not enough cement: Apply a generous, even coat to both surfaces
- Moving the joint: Once connected, hold still for at least 30 seconds
- Rushing cure time: Pressurizing too soon can blow the joint apart
- Wrong pipe size: Schedule 40 PVC is standard for irrigation - verify your size
Get Your Supplies at Lowe's
Everything you need for professional PVC pipe repairs - couplings, cement, primer, and pipe.
Shop PVC Pipe Repair Collection
As a Lowe's affiliate, I earn from qualifying purchases. Prices and availability may vary.